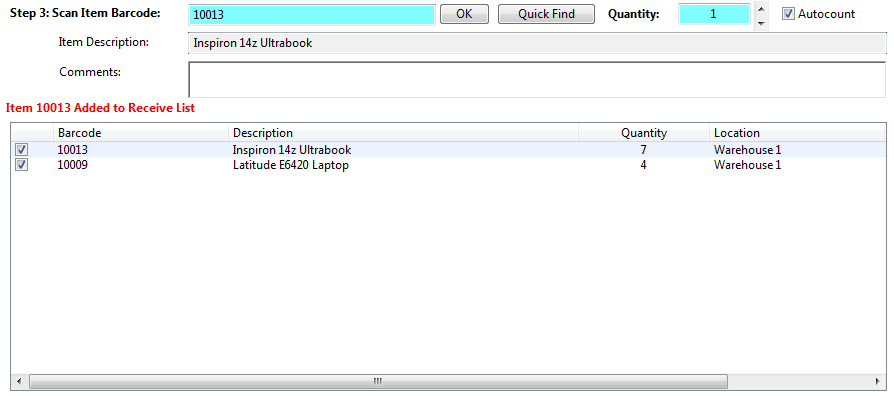
The third step is to select the items to Receive From the Supplier. As these items are selected they will appear in the “Items Pending Receipt” list box. However your items will not be finally Received until completing Step 4 – Finish Receiving.

There are two ways to select items for Receipt:
- Barcode scan or type the Item ID into the “Scan Item Barcode” text box. Click OK if you type in the barcode. The details of the Item being Received will appear in the list box. If the Autocount checkbox box is ticked then each time an item is scanned it will automatically be placed in the listbox with an additional quantity of one. If the Autocount checkbox is not ticked then scan (or type) in the barcode, set the Quantity and click the OK button. As each item is processed it will be placed in the “Items Pending Receipt” list box.
- Click the Quick Find button. A form will appear which will provide a quick search capability to find the item. Once that item has been selected it will appear in the “Scan Item Barcode” text box. If the Autocount checkbox is ticked then the Item will automatically be added.
If you select an item incorrectly it can be removed from the list by selecting it and pressing the delete key. The quantity being Received can be edited by double clicking on the item quantity in the list box.
