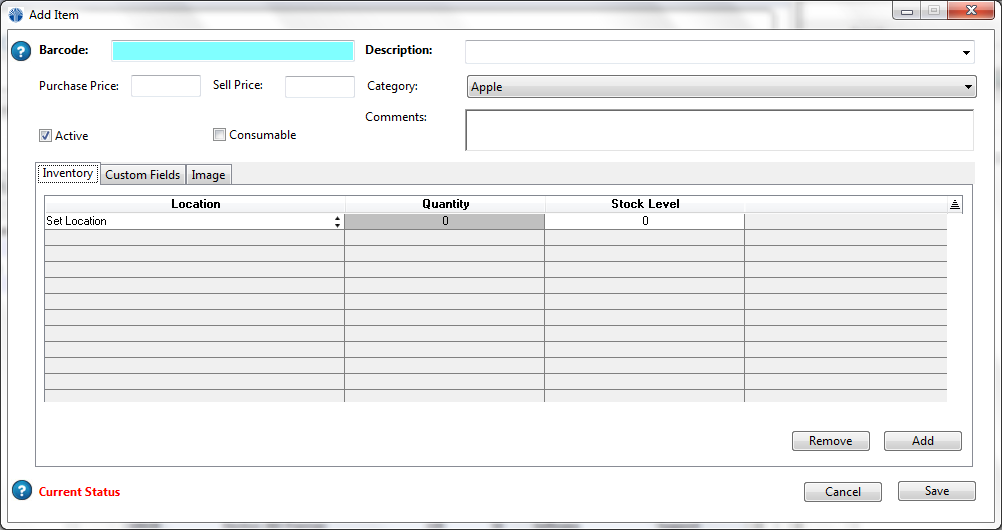
The Add Item screen is used to Add an Item that is not currently in your Stock List.
If you click “Add” the following screen appears:

The mandatory fields are Barcode and Description and you must add the Item to at least one location and specify a quantity. Note that you can add the Item to a location with a zero quantity (if you wish to specify quantities and locations later).
The barcode number must be unique. If the barcode number is already in the database, the software will prevent you from adding it. The remaining fields are optional:
Inventory Tab - Set Initial Location(s) and Quantity(s)
The Inventory Tab at the bottom of the screen is used to add the initial location(s) and quantity(s) of this stock item. Select a location from the "Set Location" pull down menu. Then set the initial quantity and stock level(optional) by clicking in the cell. Set as many locations and quantities as you wish. To remove an inventory entry, just highlight the entry and click ‘Remove’. Click ‘Add’ if you wish to create a new inventory entry

The Custom Fields Tab at the bottom of the screen allows you to define up to eight user definable text fields:

These fields can be set to whatever value you wish. To change the name of any custom field double click the label and rename the field. In the above example Custom Fields 1 and 2 have been changed to Manufacturer and Department.
An Image can be attached to an item by clicking the image (or clicking ‘Edit Image’) and selecting an image.

The image will be scaled to the size of the area. To clear the current image click the ‘Clear Image’ button.